Should you’re on the lookout for the way to setup the RetroArch PS2 core PCSX2, in any other case often known as LRPS2, you’ve discovered the best article. We’ll be breaking down the method of how one can rise up and working to play your favourite Ps 2 video games in RetroArch very quickly.
Should you’ve tried downloading the RetroArch PS2 core however discovered that your video games didn’t work, don’t fear, this can be a frequent incidence. It seems that establishing PS2 emulation in RetroArch generally is a bit trickier than among the different consoles and methods accessible.
And whereas the RetroArch PS2 core does present as accessible to downloading and set up, the reality is that there are some further steps essential to get it setup and working as effectively. You could have additionally realized that in RetroArch, the PS2 core that’s proven as accessible is isn’t named PCSX2, however moderately reveals as LRPS2. Don’t fear, the PCSX2 emulator has merely been renamed in RetroArch to LRPS2 so that is anticipated.
With out additional ado, let’s soar in and break down the way to set issues up accurately.
How To Setup The RetroArch PS2 Core PCSX2 (LRPS2)?
Obtain RetroArch
- You’ll first have to go forward and obtain and set up the RetroArch emulator which you’ll be able to seize from the official web site right here. If you have already got RetroArch put in, be sure you are on the newest steady model which you will get right here.
Get your PS2 ROM prepared
Utilizing a controller?
- A USB or Bluetooth controller is advisable when taking part in your PS2 video games. That being stated, whereas a controller is a a lot better for taking part in retro video games than a keyboard, you possibly can play nonetheless you would like.
Should you’re available in the market for a succesful new controller, an 8Bitdo SN30 Professional Wi-fi Bluetooth controller is a superb selection and can solely run you about $45 on Amazon.
1. Obtain The Obligatory PCSX2 Information
Earlier than we are able to start establishing the RetroArch PS2 core, we’ll first want to verify we now have the wanted PCSX2 emulator information. The PS2 core will use among the belongings that the PCSX2 emulator makes use of as effectively. We’ll merely be copying the required information over to the RetroArch folder on our laptop to permit the RetroArch PS2 core to work as meant.
- First issues first, head over to the PCSX2 web site and obtain the Transportable model of the emulator from their downloads web page right here: https://pcsx2.web/downloads/
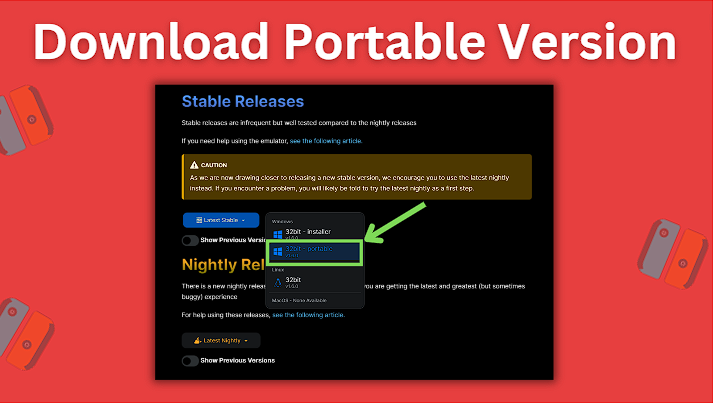
- After downloading the Transportable model of the emulator, go forward and extract PCSX2 from the archive onto your desktop or someplace straightforward to seek out
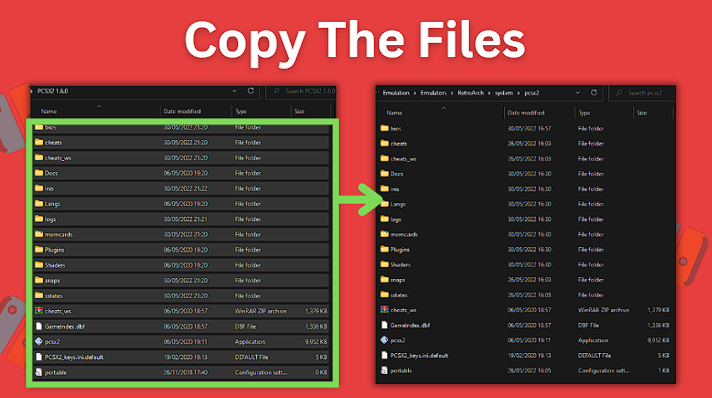
- Now create a brand new folder named pcsx2 in your RetroArch system folder throughout the RetroArch emulator’s folder in your laptop
- After creating the newly extracted Folder inside your RetroArch listing, open up the folder of the moveable model of the PCSX2 emulator that you just downloaded and extracted
- Double click on to begin the PCSX2 emulator utility and start the method of finishing the emulator’s setup
- Some further folders shall be mechanically created within the PCSX2 emulator’s set up listing while you do that
- Now go forward and choose each file within the PCSX2 listing and replica them throughout to the RetroArch/system/pcsx2/ folder inside RetroArch that you just beforehand created
2. Downloading the PS2 BIOS File Wanted
To ensure that RetroArch to correctly run its PS2 core, we additionally have to first setup a PS2 BIOS file.
- Should you don’t but have the wanted BIOS file, you possibly can simply discover the BIOS file by doing a easy Google seek for it utilizing the key phrases PS2 SPCH BIOS file
- One of many first outcomes ought to be for the Web Archive and it’s best to be capable to discover and obtain the BIOS file you want
- Take into account that the BIOS file that it’s worthwhile to obtain and use will rely upon the area for the video games that you just need to play, so for instance if you wish to play USA based mostly PS2 video games, you’ll have to obtain and use the USA BIOS file
- Go forward and obtain the .bin file of the area’s BIOS you want
- When you could have your PS2 BIOS file downloaded and prepared, copy it into the RetroArch/system/pcsx2/bios/ folder
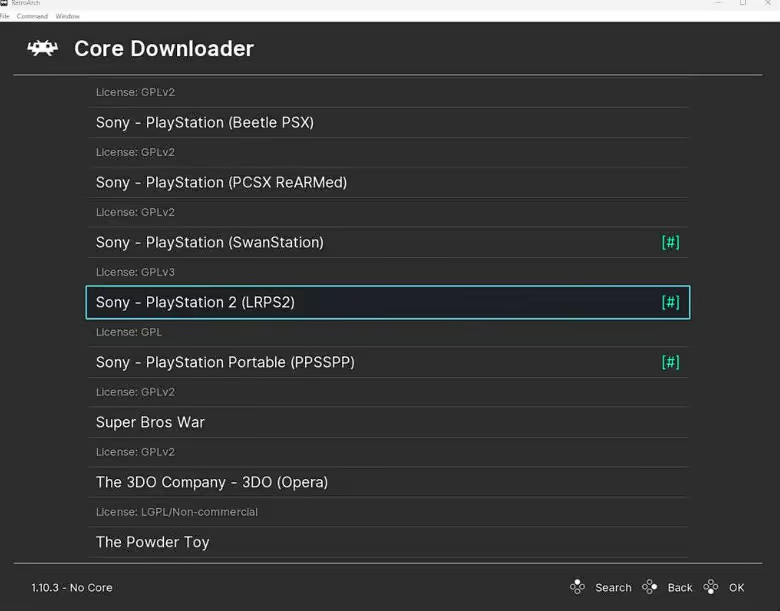
3. Discovering the PS2 Core PCSX2 (LRPS2)
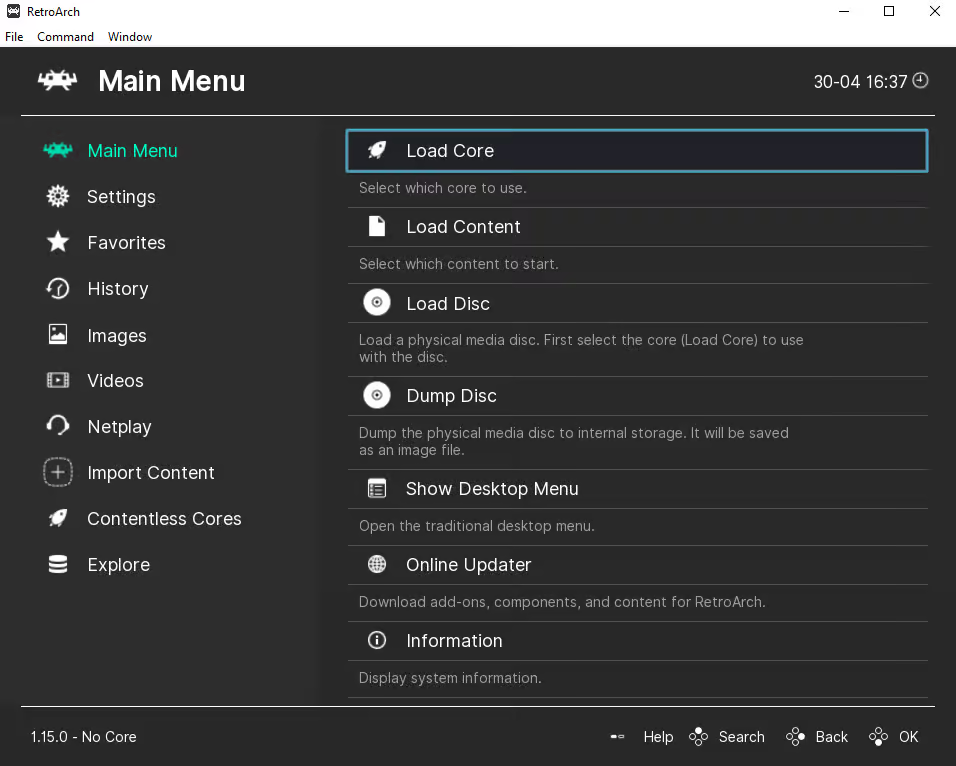
- As soon as RetroArch opens, choose Load Core
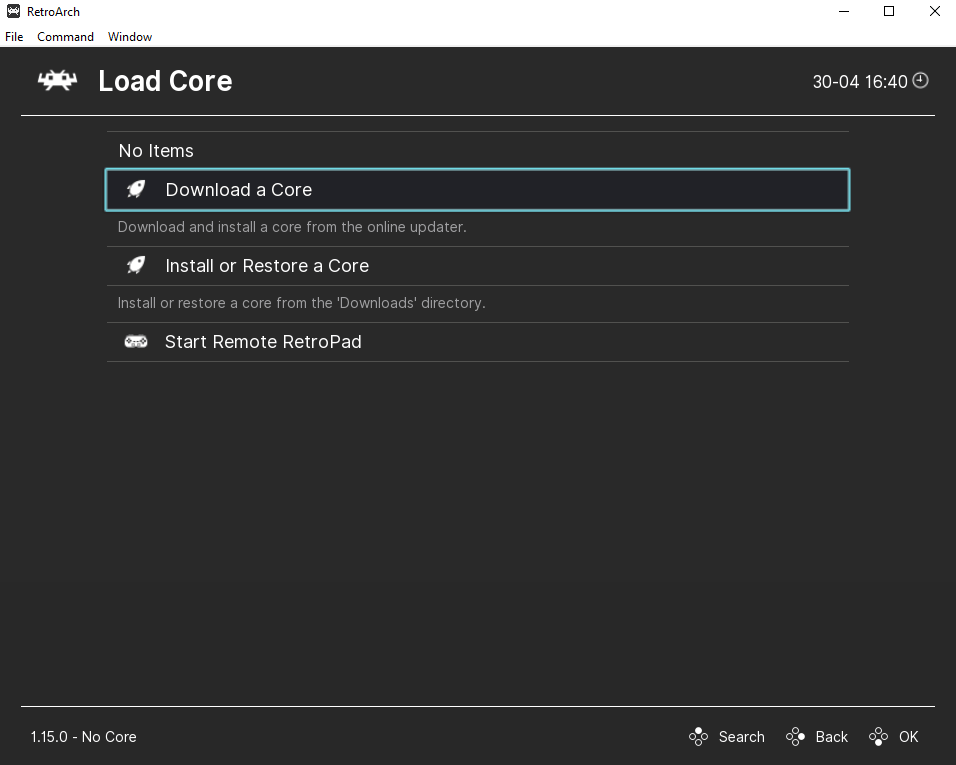
- Subsequent, select Obtain a Core
Downloading the LRPS2 Core
- Bear in mind, above we talked about that RetroArch renamed their PS2 core as LRPS2, however it’s primarily the identical because the PCSX2
- Scroll all the way in which down till you see the Sony – PlayStation 2 (LRPS2) core and choose it to obtain it
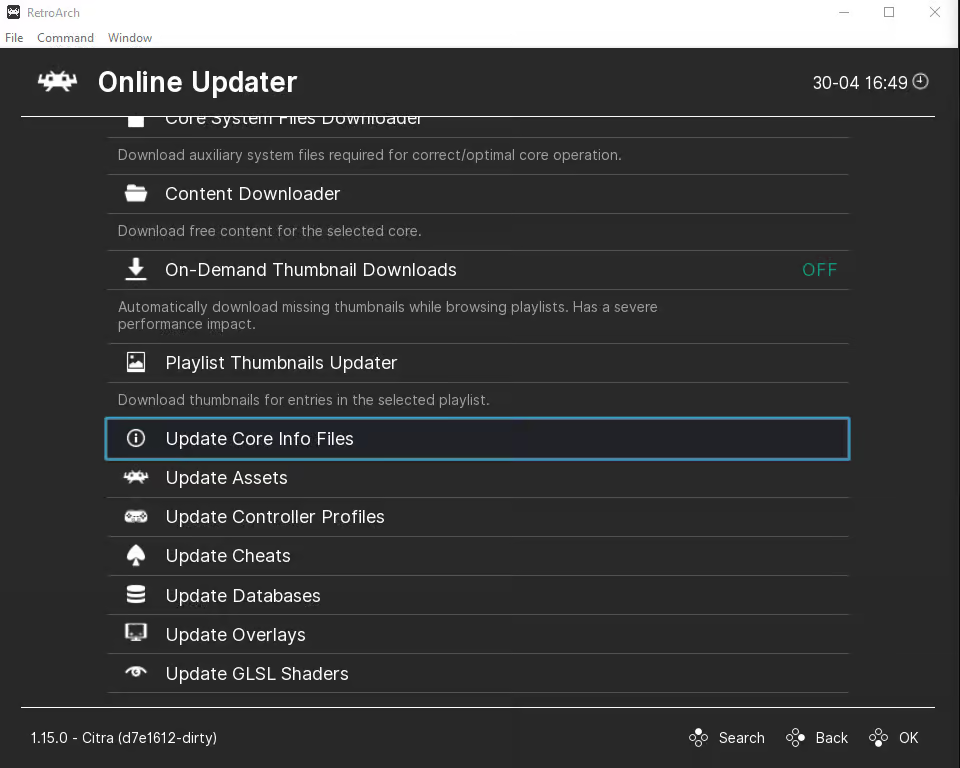
- If RetroArch was already put in in your system, it’s a good suggestion to return to the primary menu display screen and scroll down to pick On-line Updater after which choose Replace Core Information Information and in addition choose Replace Databases to make sure that all your cores data information and databases are all updated
- After it’s completed downloading, it’s possible you’ll now press again after which choose Load Core
2. How To Load Your PS2 ROM File In RetroArch
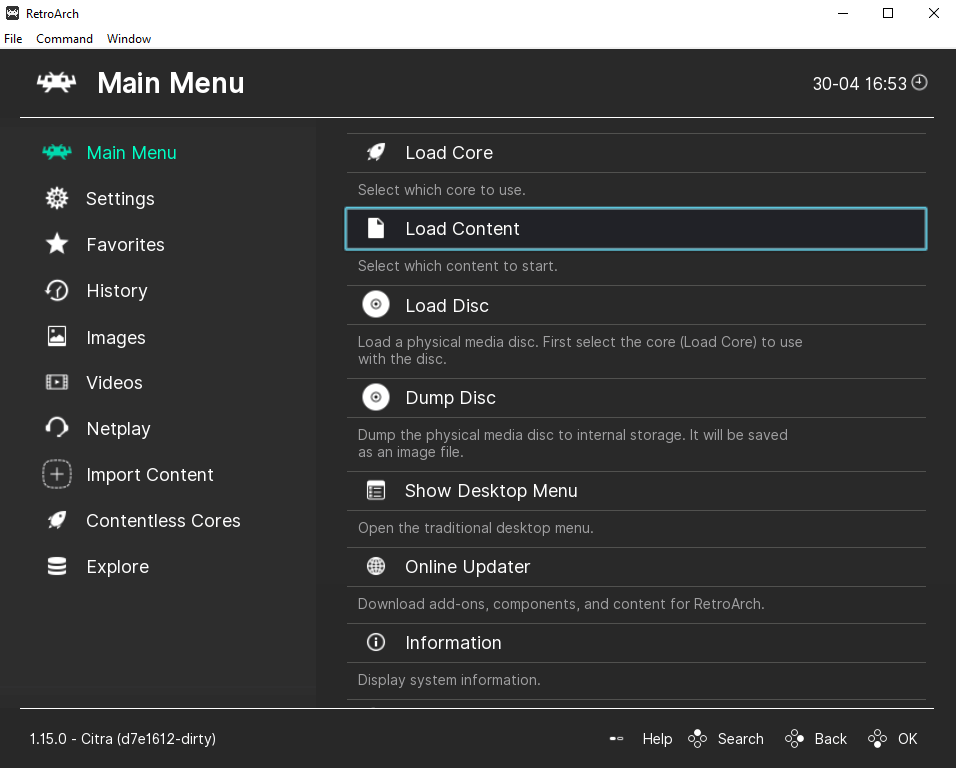
Go to Load Content material
With the PS2 core now all setup and put in in RetroArch, we’re able to load up our PS2 ROM file(s).
- Head again to the primary menu and choose Load Content material
- Find the place you saved your PS2 ROM in your laptop and choose it
- Your PS2 sport ought to now launch and voila, similar to that you just’re all set and able to play
- In case your BIOS file asks you to set the console area and time, simply choose whichever settings you favor and try to be all set
Further PS2 Core Settings, Choices, and Options
Graphics Upscaling and Enhancing Visuals
This can be a fully optionally available further step that isn’t obligatory, however if in case you have a setup with a robust graphics card, why not give it a shot? You possibly can probably upscale your PS2 video games as much as 5k if you need.
- Simply go forward and open up a PS2 sport in RetroArch and as soon as the sport launches, press the F1 key (or button assigned to the menu if in case you have it modified)
- With the menu now open, head to Choices > Video and you can be introduced with all of the video choices for the emulator
- You’ll subsequent need to select Inside Decision after which choose the decision that you really want the sport to to output in your monitor or show
- Should you discover that the primary isn’t the best selection, tinker a bit and see what appears to be like the perfect whereas nonetheless sustaining your required degree of efficiency
Supported PS2 Core File Extensions
The PPSSPP core helps the next file extensions:
- .elf
- .iso
- .ciso
- .chd
- .cso
- .bin
- .mdf
- .nrg
- .dump
- .gz
- .img
- .m3u
This text might include affiliate hyperlinks. Should you use these hyperlinks to buy an merchandise, we might earn a fee. Thanks in your assist!
