Questioning learn how to setup RetroPie SNES for the last word retro gaming expertise? You’ve discovered the fitting article as a result of we’re going to point out you simply how shortly and simply you will get your Raspberry Pi outfitted and able to launch RetroPie and SNES9x for some stable sofa Tremendous Nintendo Leisure System classics in your fashionable television display.
How To Setup RetroPie for SNES?
What You’ll Want
- If you happen to don’t have already got one, choose your self up a Raspberry Pi machine, they’re superior and so they’re obligatory to finish this tutorial – we advocate you get the Raspberry Pi 4
- You’ll additionally have to obtain RetroPie from the official web site right here
- If you happen to’ll be utilizing your Raspberry Pi to obtain obligatory information and ROMs, you’ll have to just be sure you have an exterior keyboard and mouse obtainable
- Just remember to have the SNES sport ROMs obtainable that you may be taking part in – be at liberty to verify our listing of the very best rom websites (the next file extensions varieties are allowed: .7z, .zip, .bin, .fig, .mgd, .sfc, .smc, .swc)
- Don’t neglect concerning the controller – we advocate both the 8Bitdo SN30 Professional
- If at any time you’d wish to seek the advice of the official RetroPie docs, you are able to do so on their web site right here.
1. Setup Your Raspberry Pi
Fortunately, the very best SNES emulator, SNES9x comes with RetroPie by default so so long as you obtain and set up RetroPie, you have to be good to go.

If you happen to’re utilizing an older model of RetroPie that didn’t include SNES9x preinstalled, you’ll be able to simply get it by doing the next:
- In RetroPie settings, head to RetroPie Setup
- Subsequent, go to Handle packages > Handle fundamental packages
- Go down after which select lr-snes9x2010
- After that, select Set up from pre-compiled binary
- Let RetroPie obtain the SNES9x emulator and as soon as it finishes, you’ll be able to return by way of the menu and select Exit
2. Put Your SNES Roms Onto Your RetroPie
We’ll now be transferring our SNES ROMs onto our RetroPie.
Transfer ROM Information Utilizing Your Raspberry Pi
You’ll have to have the Pixel desktop setting instrument put in in your Raspberry Pi to have the ability to entry desktop mode on it. We’ll now be protecting learn how to get this setup.
Head to the RetroPie choices menu after which go forward and go to RetroPie Setup > Configuration / Instruments > Raspbian Instruments > Set up Pixel desktop setting.
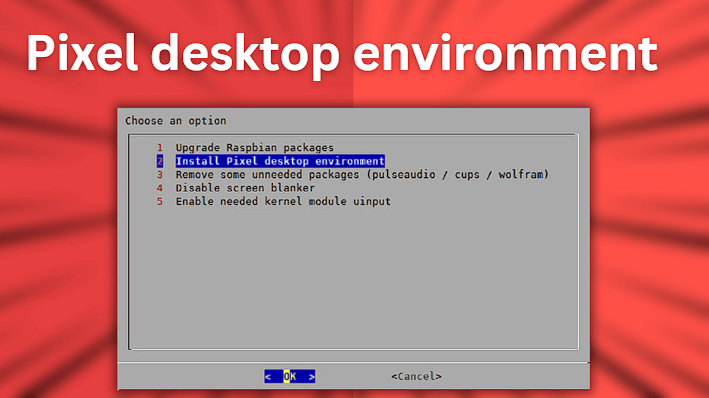
After you might have efficiently put in the Pixel desktop setting in your Raspberry Pi, go forward and restart the machine. After restarting, you need to now be capable to entry desktop mode by going to Ports > Desktop.
The desktop setting lets you navigate the information in your Raspberry Pi equally to how you’ll on a Home windows pc.
Now that we’ve put in the desktop setting, we’ll want to maneuver our SNES ROM(s) to the correct folder on our Raspberry Pi:
- /house/pi/RetroPie/roms/snes/
Distant Entry Your Raspberry Pi From Your PC
The simplest solution to get information out of your PC pc to your Raspberry Pi is by remotely accessing the Pi out of your PC. To do that, you’ll first need to be sure that your Raspberry Pi is related to the identical community as your PC.
First be certain that your Pi is related to your WiFi or to your community router straight utilizing an ethernet cable.
Open up the Home windows file explorer in your PC and kind retropie into the handle bar on the high. After ready for a couple of minutes, your Raspberry Pi ought to seem. If it doesn’t seem, there are a number of further steps we’ll have to take. If yours does seem, you’ll be able to go forward and skip to straight beneath the Distant Entry screenshot proven down beneath.
In your Raspberry Pi, open the terminal window and kind in:
- sudo apt-get set up xrdp
This command will now start to put in the distant desktop server.
Now you’ll want to determine the IP handle of your Raspberry Pi. To do that kind, you’ll need to use the next command:
Make a remark of your Raspberry Pi’s IP handle as a result of we might want to use this quickly in an effort to connect with it remotely. You’ll additionally want your Pi’s username and password.
Now in your PC, go forward and open the distant desktop app by typing distant desktop into the Home windows search bar within the backside left. Click on distant desktop connection to make use of the distant desktop app.
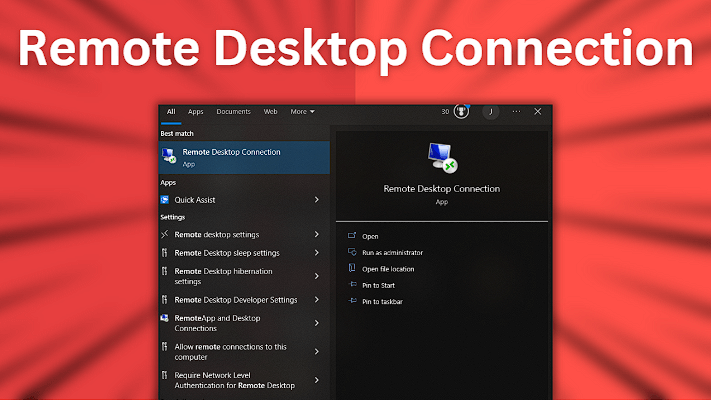
Seek for and choose Distant Desktop Connection in your PC
Within the Distant Desktop Connection window that pops up, you’ll now need to enter the IP handle of your Raspberry Pi that you just acquired earlier. After clicking join, then login utilizing your Raspberry Pi’s username and password.
If all the things went appropriately, you need to now be capable to remotely entry your Raspberry Pi out of your PC. To double verify that you’ll be able to entry your Raspberry Pi remotely, open up Home windows File Explorer and kind retropie into the handle bar. You need to see your Retropie information seem.
Whether or not your Raspberry Pi appeared robotically otherwise you wanted to do the extra steps, now we’re transferring on to the ultimate components.
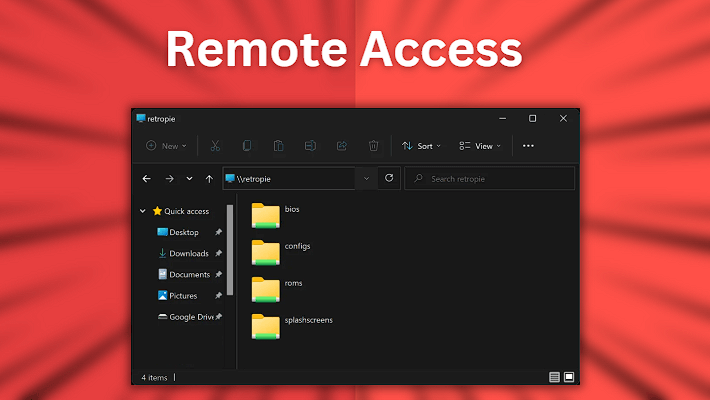
Bear in mind earlier, we talked about that we would wish to repeat our SNES ROMs from our PC to this listing on our Raspberry Pi:
Navigate to roms > snes and replica your SNES ROMs information out of your PC to this folder in your Raspberry Pi. After you’ve copied your ROMs over, restart your Raspberry Pi and the video games ought to now seem as anticipated.
3. Play Your SNES Video games
Now that your Raspberry Pi has been restarted and is all setup and able to go, you’ll be able to boot up EmulationStation and when you spotlight Tremendous Nintendo, it ought to present you on the backside what number of video games can be found to be performed for that console. You’re able to play!
You’ll want to try our information on learn how to setup RetroPie N64 as effectively.
This text might include affiliate hyperlinks. If you happen to use these hyperlinks to buy an merchandise, we might earn a fee. Thanks on your help!

