Determining how one can discover the entire collectible areas on the Mountain Ascent on Koboh doesn’t must be a mountain of a job whereas taking part in Jedi: Survivor. The scale of the world is comparatively small in comparison with different areas, and it takes a fraction of the trouble required to search out all of the collectibles on the Arid Flats on Jedha. Nonetheless, some fast ideas together with a helpful map definitely flip the duty of getting all the things on the Mountain Ascent into a neater affair.
Learn how to discover all Mountain Ascent collectibles in Jedi: Survivor
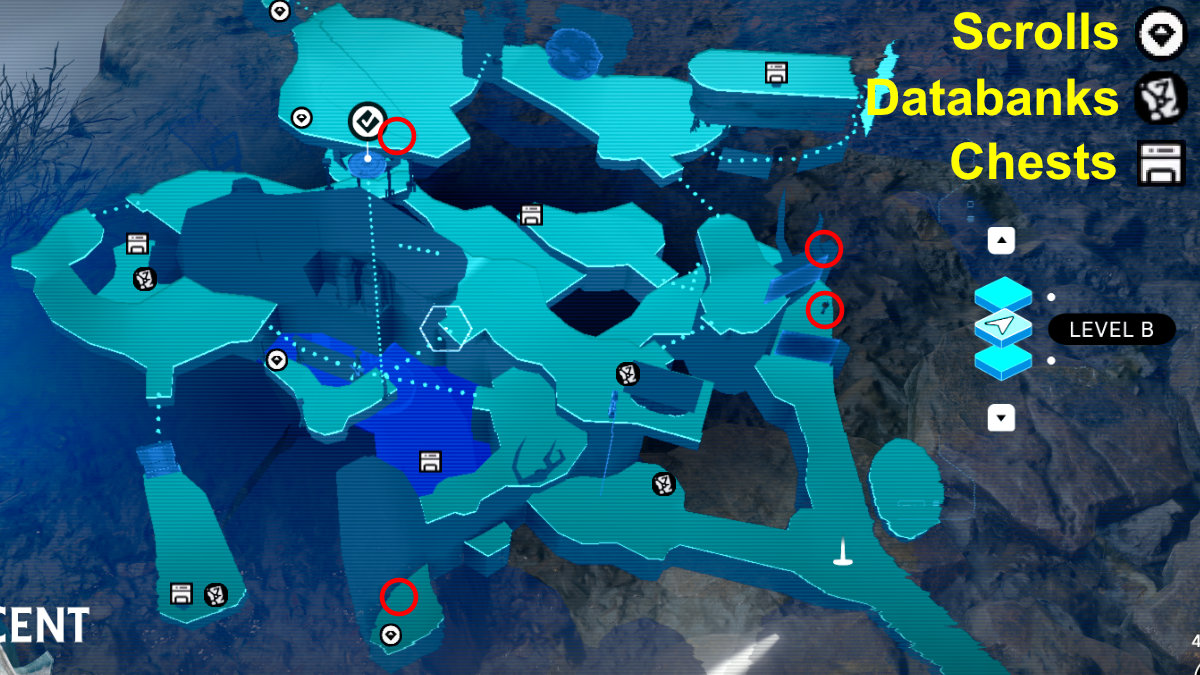
We’ve included a map that will help you discover the entire Mountain Ascent collectibles in Jedi: Survivor together with particular person walkthroughs for every merchandise. This information handles the entire collectibles by class, so it is best to learn by way of the whole information earlier than beginning to save time as you progress round every a part of the Mountain Ascent. Notice that you simply’ll additionally want Merrin’s Attraction which permits you sprint by way of ray shields so as to entry many of the Mountain Ascent.
There’s additionally a Meditation Chamber with separate collectibles except for the Databank Entries, chests, Priorite Shards, Safety Droid Slicing improve, and the Seed Pod hidden throughout the Mountain Ascent. Entry the Meditation Chamber beneath the waterfall.
Picture by PC Invasion
All Databank Entries
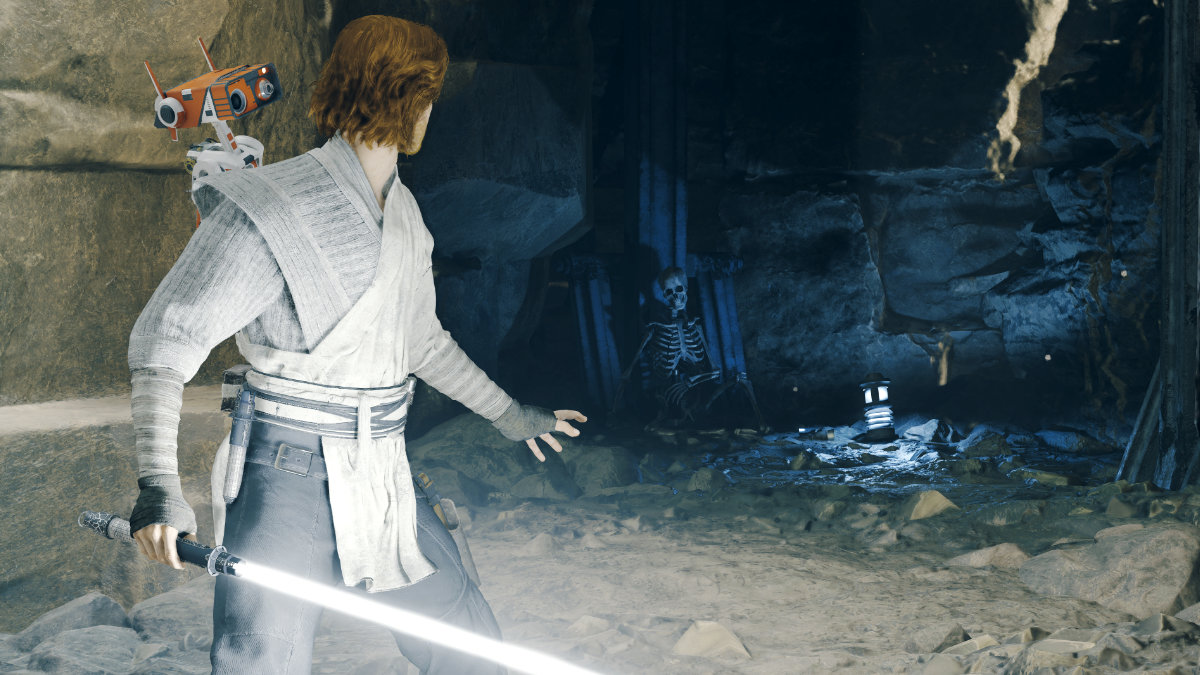
The primary Databank Entry is close to the Meditation Level at the start of the world. Run down the trail and take the left fork to the decrease touchdown. The Databank Entry lies subsequent to the skeleton of a prospector.
The following Databank Entry is previous the ray shields, down the principle path and up throughout the pool of water to the proper. When you Grapple and wall run over the pool of water there’s a cave off to the left. You’ll want the Drive Carry capability to open a door contained in the cave. The Databank is on the finish of the tunnel behind the door.
Depart the cave again to the principle path and drop down into the pit within the subsequent space to scan the Tie Fighter wreckage.
From there, proceed throughout the pit and comply with the trail on in direction of the middle of the Mountain Ascent zone. There’s an odd shack construction with blue paint that that you must scan for the subsequent Databank Entry.
All chests
The primary chest is previous the inexperienced ray shields on a decrease degree. Instantly take a proper after passing by way of the shields and soar throughout the chasm. The chest is within the again to the left. This chest is the place to search out the Bomber Outfit Pants.
The following chest is close by in a pool of water. Return again to the principle path and proceed ahead till it ends with the pool of water on the proper. Dive down and also you’ll discover the chest. This chest is the place to search out the Mild Mustache and Patch Coiffure for Cal.
You’ll want the Drive Carry capability to succeed in the subsequent chest and BD’s chest slicing capability to open it. Cross the pool of water utilizing the Grapple after which wall run and leap as much as the subsequent path. Look to the left and also you’ll see a cave with a shut door. Carry that door after which soar by way of it to search out the chest inside. That is the place to get the Mustache and Patch Beard choice.
The fourth chest is additional forward, again on the principle path. Exit the cave and also you’ll come across a pit with a wrecked Tie Fighter. There’s a destructible chest on the far finish. Open it by Drive Lifting it then Drive Slamming it down. That is the place to search out the favored Drifter Outfit Jacket.
The final chest is on the highest level of the Mountain Ascent and requires some acrobatics to get there. Go to the big higher space the place the big squad of Stormtroopers spawn and look again in direction of the course of the doorway to the Mountain Ascent. You’ll see a pair runnable partitions to the left which result in a scalable column that opens to a small touchdown. The chest is on that touchdown. Drive Carry it and Slam it to retrieve the Scrapyard Audio Sensors BD-1 beauty.
Picture by PC Invasion
All Priorite Shards
The primary Priorite Shard is close to the Meditation Level at the start of the world. Run down the trail and take the left fork to the decrease touchdown. Proceed previous to the left and soar to a different touchdown, after which soar once more to the ultimate touchdown previous the waterfall. You’ll discover it close to the ledge.
The following Priorite Shard is on the higher degree. Head to the middle of the Mountain Ascent close to the small construction that appears like a hut with blue partitions. There’s a cave off to the aspect you may soar and Air Sprint to. You’ll discover a skeleton with the Priorite Shard on the again.
Move by way of the bigger part on the prime the place the squad of Stormtroopers blocks the best way. There are two Bilemaws within the subsequent pit. You’ll must defeat them so as to entry the Priorite Shard. Look alongside the wall on the left aspect of the pit till you see the pile of rocks. Use Drive Carry to extract the Priorite Shard.
Transfer forward into the chasm and Grapple as much as the subsequent touchdown. The final Priorite Shard is there, laying out within the open.
All Seed Pods
Notice that the entire Seed Pods are circled on the map. We additionally circled the Safety Droid Slicing improve.
You’ll discover the Felucian Spiker Seed Pod in the identical location the place the primary Priorite Shard is. Seek advice from that description to search out it.
The second Seed Pod is the Koboh Spiker. It’s positioned at a bush simply above the second ray protect door. Go to the higher degree and drop down onto the door body and stroll throughout it to succeed in the Seed Pod.
The final Koboh Spiker Seed Pod is within the pit space on the prime rear space of the Mountain Ascent the place the 2 Bilemaws reside. It’s close to the small opening the place the water flows by way of and down the falls.
You can even discover the Safety Droid Slicing improve between the 2 inexperienced ray shields at a terminal. You’ll simply discover it when passing by way of the world.
Now you understand how to search out the entire Mountain Ascent collectibles in Jedi: Survivor. We even have guides on the place to search out the entire collectibles on the Loading Gantry close to the Lucrehulk along with in style areas on Jedha. These embody the entire Desert Ridge chest areas and all collectible areas at Arid Flats to call a couple of.

