You might be locked up excessive within the Divination Tower within the Magic DLC for Escape Simulator. Let me stroll you thru easy methods to escape step-by-step. On the finish, I’ll additionally present you the places for the hidden Tokens!
Activate the Teleporter
Earlier than we do something, let’s activate the Teleporter that can hyperlink the tower you’re in with the second tower to journey seamless for the long run puzzles.

On the balcony of the primary tower is a tool. We’d like the Teleporter Star to activate it. This may be discovered within the draw below the enormous e-book.
Seize the Teleporter Star and place it within the teleporter to activate it. Now for later puzzles, our stream received’t be interrupted.
The primary puzzles we’re going to unravel will principally concern the primary tower as we attempt to discover three Starpins that we’ll want for the puzzle after. The primary two are easy, however to seek out the third would require quite a lot of different puzzling. Let’s start!
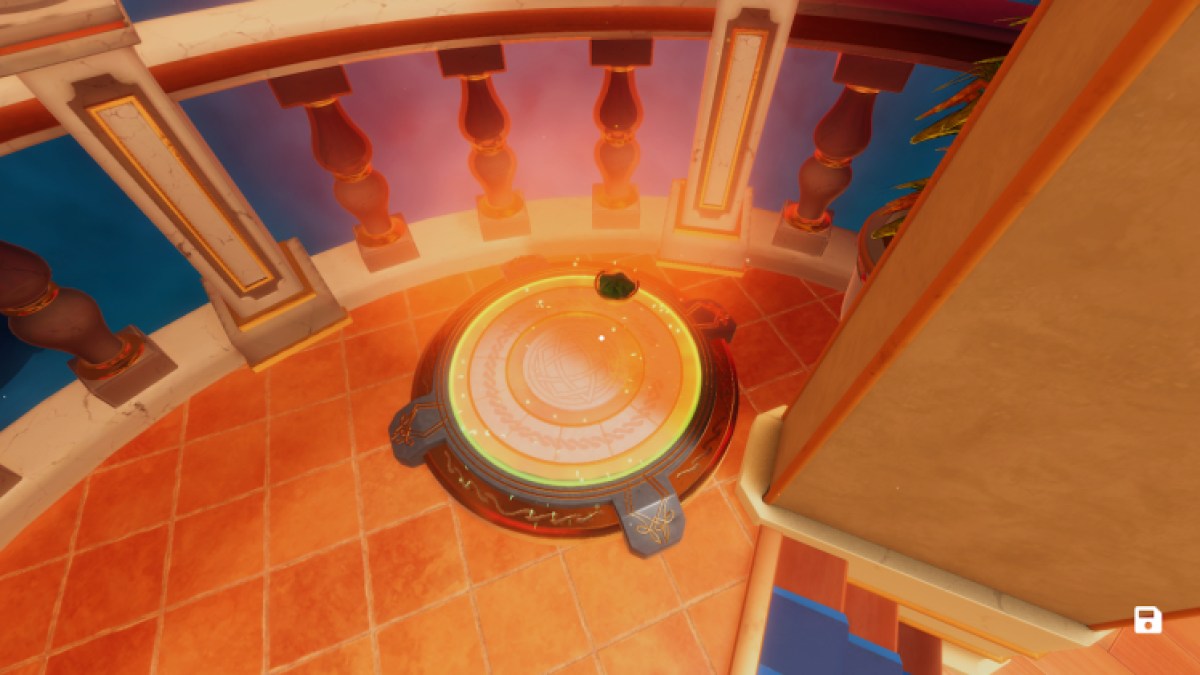
Starpin Puzzle 1 – The Globes
The best of all three Starpin Puzzles is the one which considerations the Globes dotted across the first tower. In case you have a look at the central column, there’s a aspect that hosts three dials, and above every one, a unique Globe.
You will discover these Globes on the three tables across the room. The bottoms of the Globes match as much as these above the dials. It’s worthwhile to orientate your self in a strategy to see the sigils every Globe is exhibiting, after which rotate the respective dials to their sigils.


The mix on the wall ought to seem like this earlier than you press the button:
The wall will dissolve, revealing the primary Starpin. On to the subsequent.
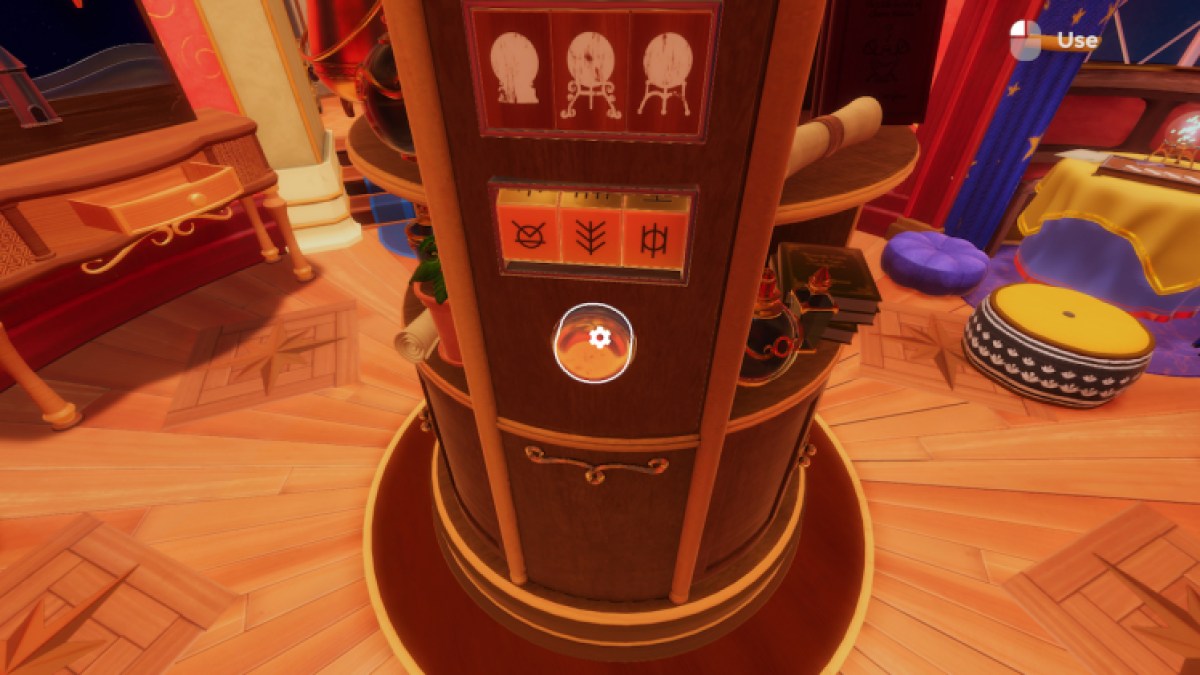
Starpin Puzzle 2 – The Tea Cups
This subsequent puzzle is a bit more difficult, however straightforward as soon as understood. On the three tables you can see three Tea Cups. Choose all of them up.

These Tea Cups all show an animal inside – a wolf, a raven, and an octopus. Additionally on a desk will you discover a ‘Deciphering Animal Runes’ word. Choose that up, too.
This word inform us easy methods to remodel an animal right into a rune. The outer ring particulars the legs of the creature via rectangles, and the image within the center particulars its habitat.
In case you go to the central column once more, you can see a wall with three suns and three dials with these runes.
On the backside of the Tea Cups, below the animals, are solar indicators. We should rotate the dials to match the animal rune to the solar that the animal is on high of within the Tea Cups. See beneath for the answer.

The Wolf is a land creature with 4 legs, so the circle has 4 rectangles that surrounds a sq.. This logic is adopted for the opposite dials.
Press the button to dissolve that wall and discover the second Starpin. On to the ultimate one.
Starpin Puzzle 3 – The Tarot Playing cards
This Starpin puzzle is a bit more difficult. On a desk within the first tower is a stand with 5 slots for 5 Tarot Playing cards. There are two already on the stand, however we’d like three extra.

The opposite three Tarot Playing cards are all within the locked chest on the balcony of the primary tower. The tag for this lock has 4 shapes on it. To seek out this answer, we might want to clear up one other puzzle within the second tower.
Palm studying Fergus Grimm
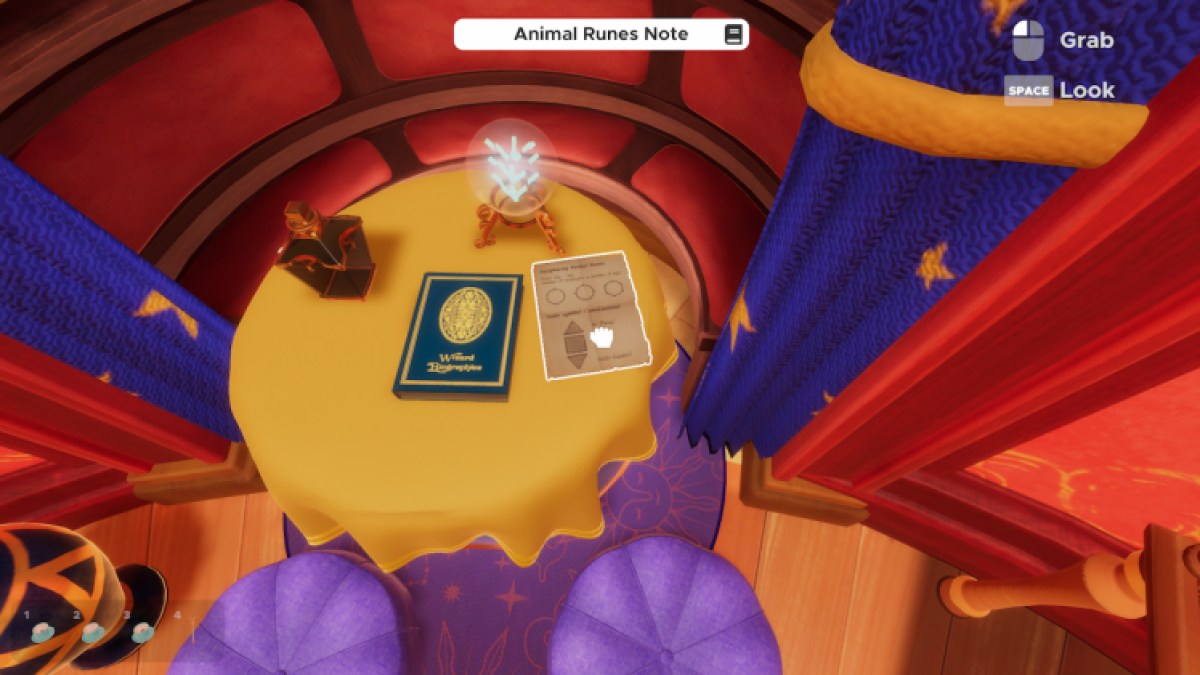
Choose up the Wizard Biographies e-book on a desk within the first tower – we’ll want it.
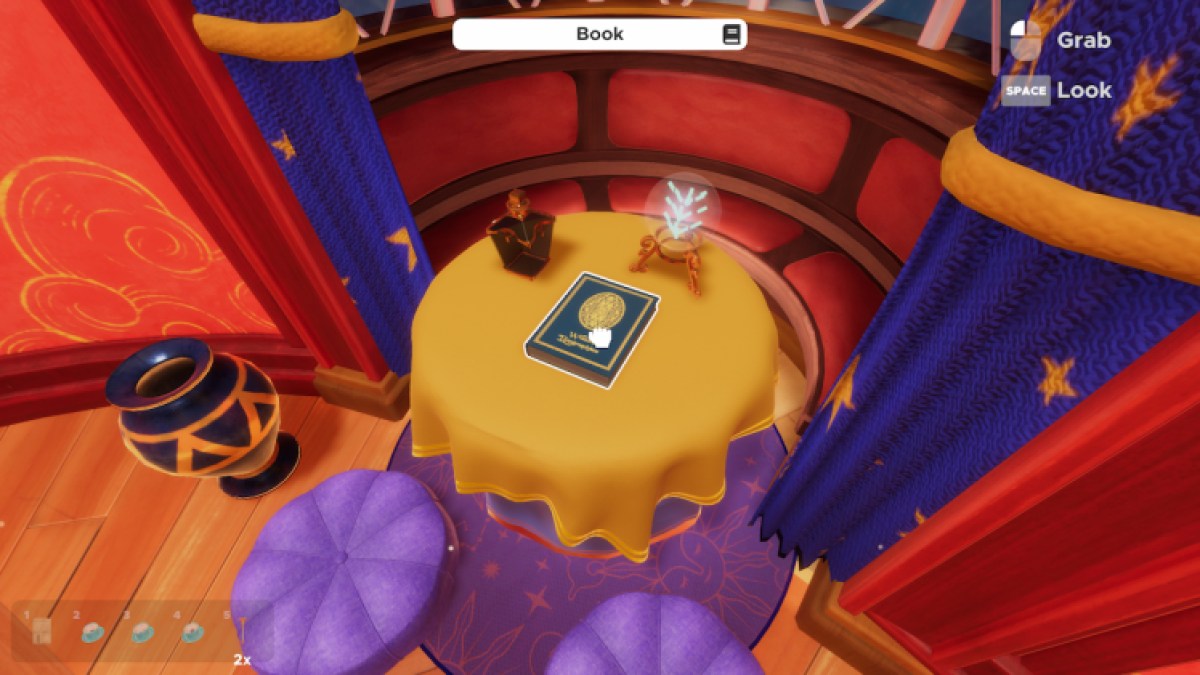
Open this e-book in your stock and pin it. Additionally, seize the Palmistry Poster off the wall and in addition pin that in your stock too. You’ll have to see each of this stuff to unravel the approaching puzzle.
Use the teleporter to journey to the balcony of the second tower. You may take a look round should you’d like, however all we’d like is the enormous palm with Fergus Grimm inscribed upon it that’s on the balcony.

We have to set this palm utilizing Fergus Grimm’s biography. There are 4 sliders on the palm, and due to the poster, we all know that they stand for Love, Well being, and Life. We have to rank Grimm towards the three different Wizards to set the sliders corrently.
Studying his biography, we all know that he was alone. We are able to set the primary slider all the best way to the left. He was the loneliest out of the opposite wizards.
We additionally know that he was richer than Arthur Bell, however poorer than Dahlia Owler, who in flip was poorer than Laura Bagby, making Brimm the second poorest of all of the wizards. So we’ll set the second slider to the center left place.
Lastly, we all know that he lived for simply over a century. Arthur Bell lived for nearly two centuries, and the opposite two wizards didn’t final one. We are going to set the ultimate slider to the center proper place.
Lastly, we should set the ring to the right finger place. Above Fergus Grimm’s head within the e-book, there’s a dial that factors to the proper. We are able to match that round arc with the poster, discovering a sigil. Take the ring off of the finger and place it on the high of the center finger.

Upon doing this, the Sphere of Symbols will instantly materialize.
The Sphere of Symbols
Lastly, we are able to use this Sphere of Symbols to crack the code for the chest. The tag had 4 shapes on this order: a sq., a circle, a hexagon, after which a triangle.
The Sphere os Symbols has 4 patterns of shapes and numbers. We have to discover that row of shapes and memorize the numbers they displayed.

We are going to discover the quantity sequence of 4218.
Upon placing that quantity mixture into the lock of the chest on the primary balcony, we’ll unlock the chest, revealing three Tarot Playing cards.
Fixing the Tarot Playing cards
With all 5 Tarot Playing cards now in our possession, we have to place all of them within the right order on the Tarot Stand. They every have an image on them, so hold putting and swapping them till you discover the next image:

Upon doing so, you’ll reveal a quantity sequence. Discover the ultimate set of dials on the column within the centre of the room. Enter the code 41725 to disclose the ultimate Starpin.
Associated: Escape Simulator Magic Store Walkthrough & Token places (Magic DLC)
The Constellations Puzzle
With all three Starpins, we are able to head over to the second tower. To the left is a big grid, with two glowing Starpin Connectors already in it. Utilizing these connectors and the three Starpins, we might want to match the three constellations hovering within the sky exterior.

One after the other, organise the Starpins on the board – anyplace on the board – to mimic the constellations. Observe that solely the Starpin Connectors will join with different Starpins, they usually’ll solely join in the event that they’re on one of many adjoining grid areas.
See beneath for all three orientations to unravel this puzzle.
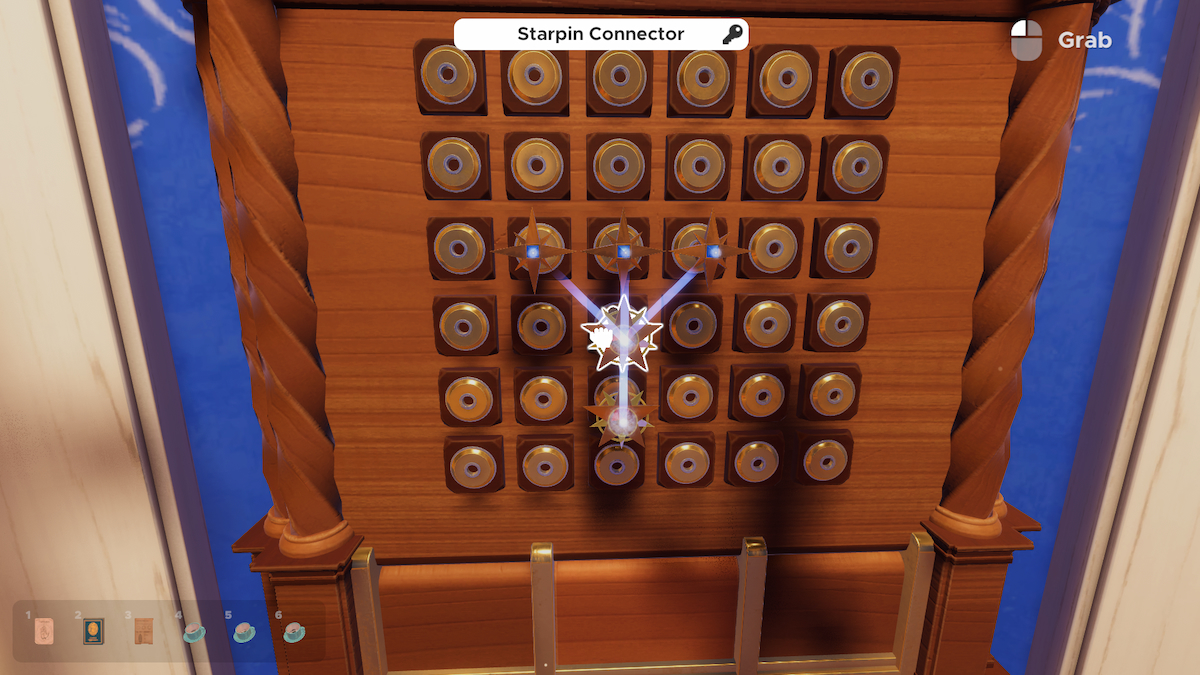
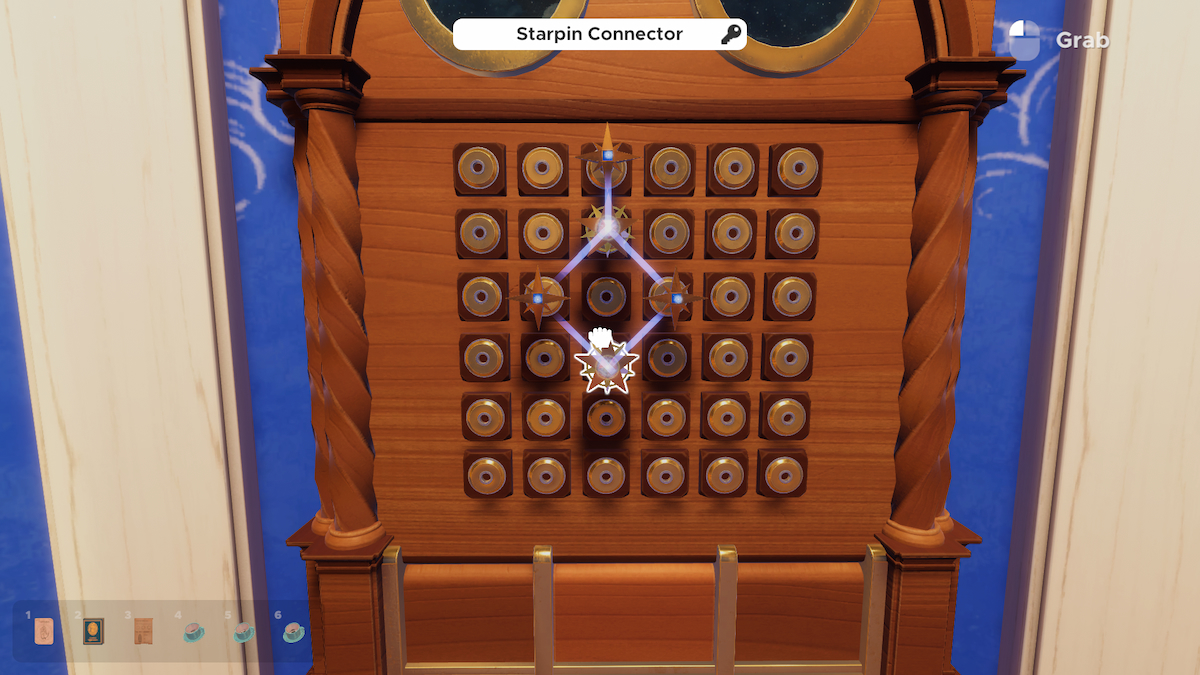
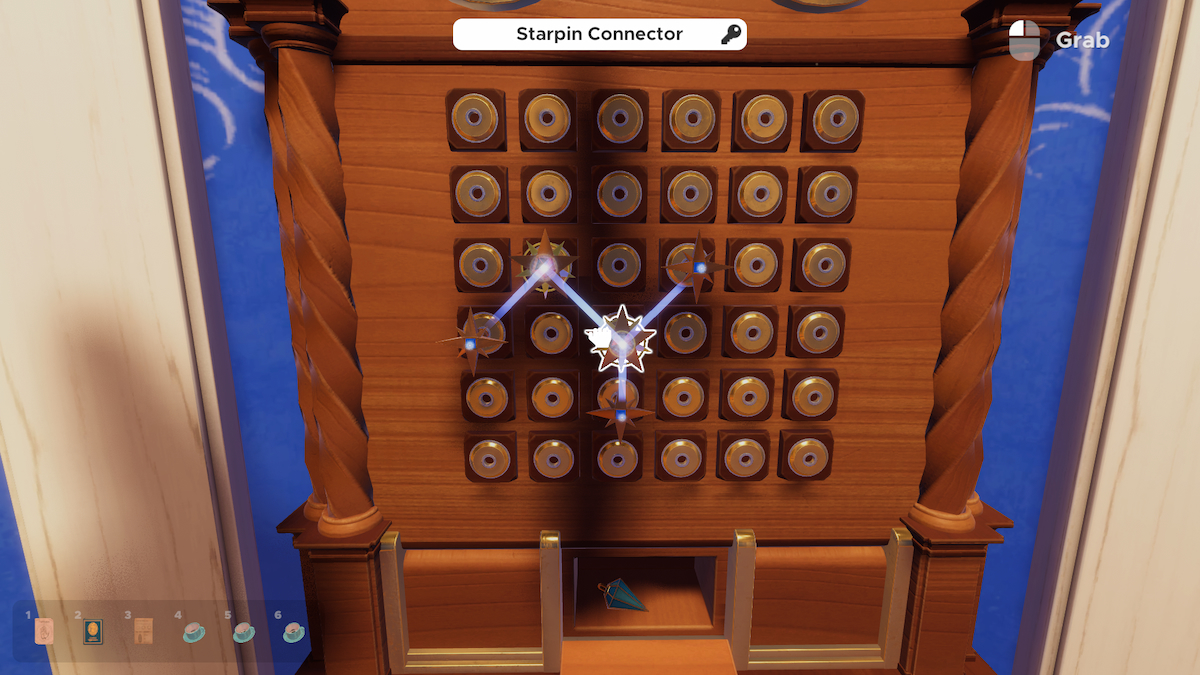
As soon as all three constellations have been emulated, the Pendulum Crystal might be freed. This might be wanted to unravel the subsequent puzzle.
The Pendulum Puzzle
Earlier than we get began, we’ll want an vital poster from the primary tower. So shortly return and seize and pin the Pendulum Divination poster.

Return to the second tower and place the Pendulum Crystal on the hook hanging from a tower within the centre of the room.
There are 4 towers on that stand, and you’ll increase and drop them to show a sure roman numeral. The Pendulum Divination poster tells us {that a} easy swing from the Pendulum means ‘1’, and a round swing means ‘5’.

We have to rotate the desk to point out a tower similar to one of many towers on the stand, and add up the Pendulum swings to discover a quantity. We are going to then set that tower to that roman numeral.
In a clockwise order from the Pendulum, the towers’ numbers are 5, 7, 1 and three. When you’ve set the towers to these roman numerals, they’ll all drop, and the six Flying Keys will all drop to the ground. Go across the desk and choose all of them up.
The Tapestry Puzzle
4 of those six keys will grant you your freedom, however you’ve not solely received to determine which of them, but additionally which lock they belong to.

On the proper aspect of the second tower is a big tapestry with a lectern in entrance of it. To resolve this puzzle, we’d like the story e-book that matches in it. The one downside is, we’ve received to shrink it first.
Shrinking the Star Guide
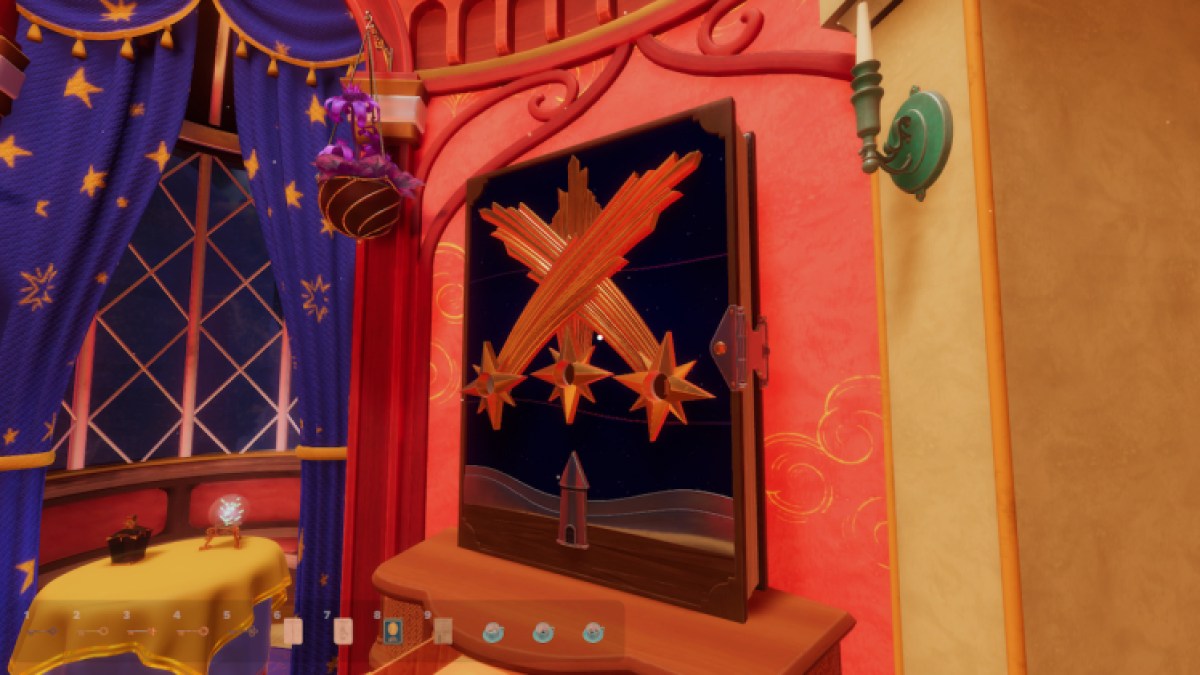
Head again to the primary tower. On the proper you’ll see an enormous e-book with three taking pictures stars on it. In case you have a look at the second tower, you’ll discover that quite a few taking pictures stars arc in three alternative ways intermittently.
Rely the celebrities in every arc, and set the taking pictures stars on the enormous e-book to these numbers. The order ought to be 2,7,5.
As soon as the mixture of the e-book is right, the e-book will shrink, and you’ll choose it up.
With the Large Guide, return to the lectern and place the Large Guide on it and it’ll unfold right into a story e-book.
Story time

To resolve the Tapestry puzzle, we have to set the pictures on the proper web page of the Large Guide in accordance with the tapestry and the story on the left web page.
Upon shifting an merchandise on the proper web page, it’ll transfer on the tapestry. We have to transfer the objects into the crimson circles in the proper order.
The journey begins on the underside left, so transfer the hero to the very backside left of the web page to slot in the underside left circle. The story says he wants a sword, so we’ll transfer the sword picture to the highest proper circle, as that’s the subsequent cease.
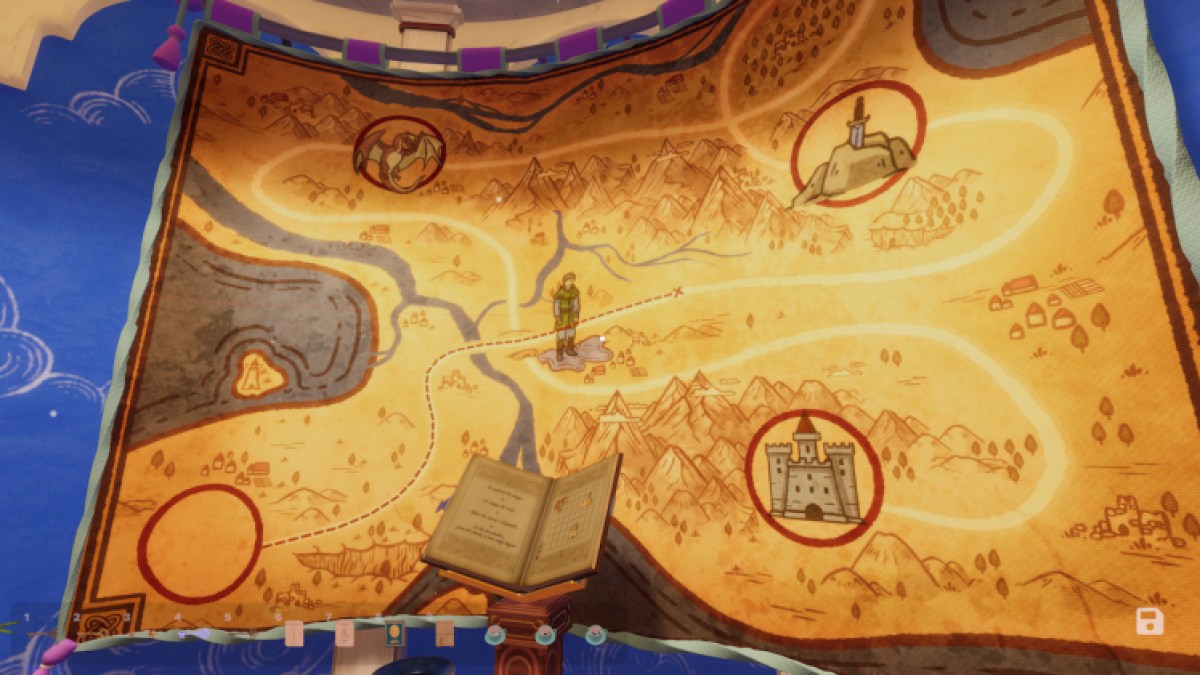
Then, the hero slays the dragon, so we’ll transfer the dragon to the highest left circle. Lastly, we’ll place the fort within the backside proper circle.
With that carried out, you’ll get to look at the hero embark on his journey. With that full, a element will open within the lectern, revealing a Self-Writing Quill.
Filtering the Keys
With this quill, we are able to reveal the order of the keys we’d like out of the six we’ve.
Return to the primary tower and seize the Unfinished Observe on the desk. Examine the word in your stock and use the Self-Writing Quill by dragging it on the word. It is going to reveal the behaviour of the keys we’d like, and the order through which they’ll get used.

Utilizing the behaviour right here, we are able to filter out the keys we’d like. Head again to the primary tower earlier than we start.
The best one to type first is the Ticklish key. Go into your stock and click on on every of the six keys. The one which giggles and twitches goes into the proper key gap. Insert it there now.

Then, one after the other, drop the keys onto the ground in the identical spot. If one bounces, then that’s the bouncy key, and belongs within the backside lock.

If one key retains pushing the others which can be dropped away, then that’s the Repeller key and belongs in the proper lock.

Lastly, one of many keys might or might not be glowing. In that case, then that’s the Everbright key, and belongs within the high lock. If not, accumulate the remaining Keys and go exterior. One will glow in your stock, which would be the Everbright Key.

As quickly because the final secret is positioned within the lock, the door will open, and also you’d have escaped. Properly carried out!
Associated: Escape Simulator Potions Backyard Walkthrough & Token places (Magic DLC)
All Token places for Divination Tower
Listed below are the places for the Tokens within the Divination Tower that I’ve managed to seek out to this point. I’ll replace this listing as I discover extra, so return again later!
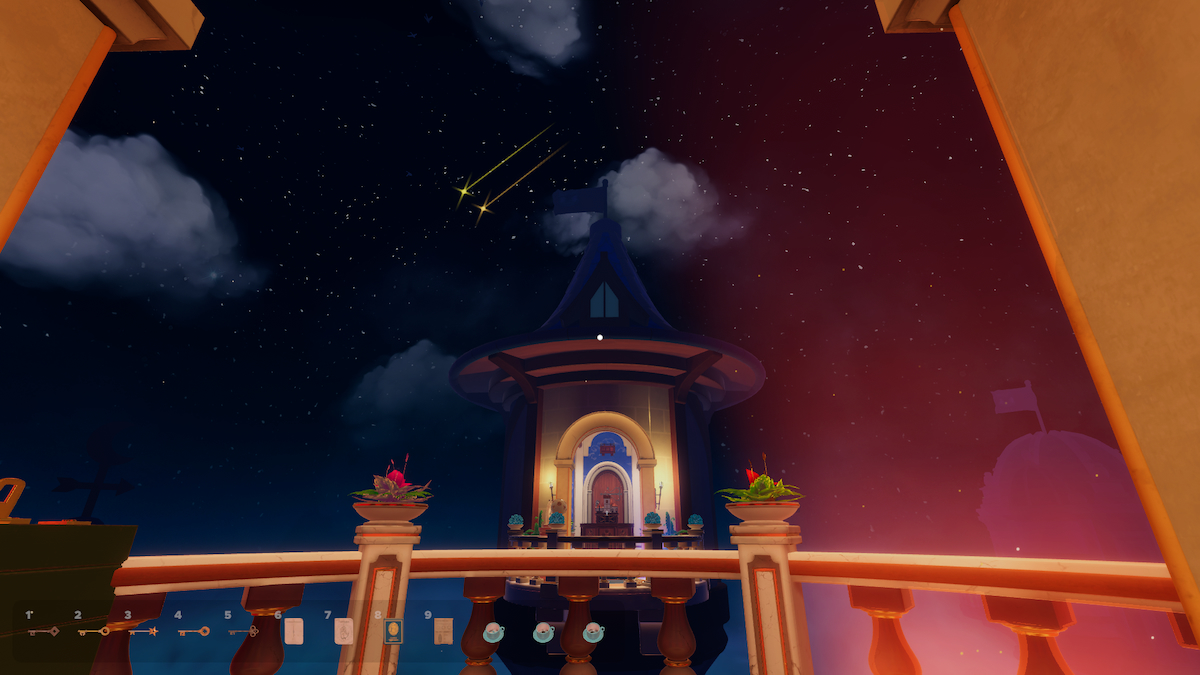
Within the clouds
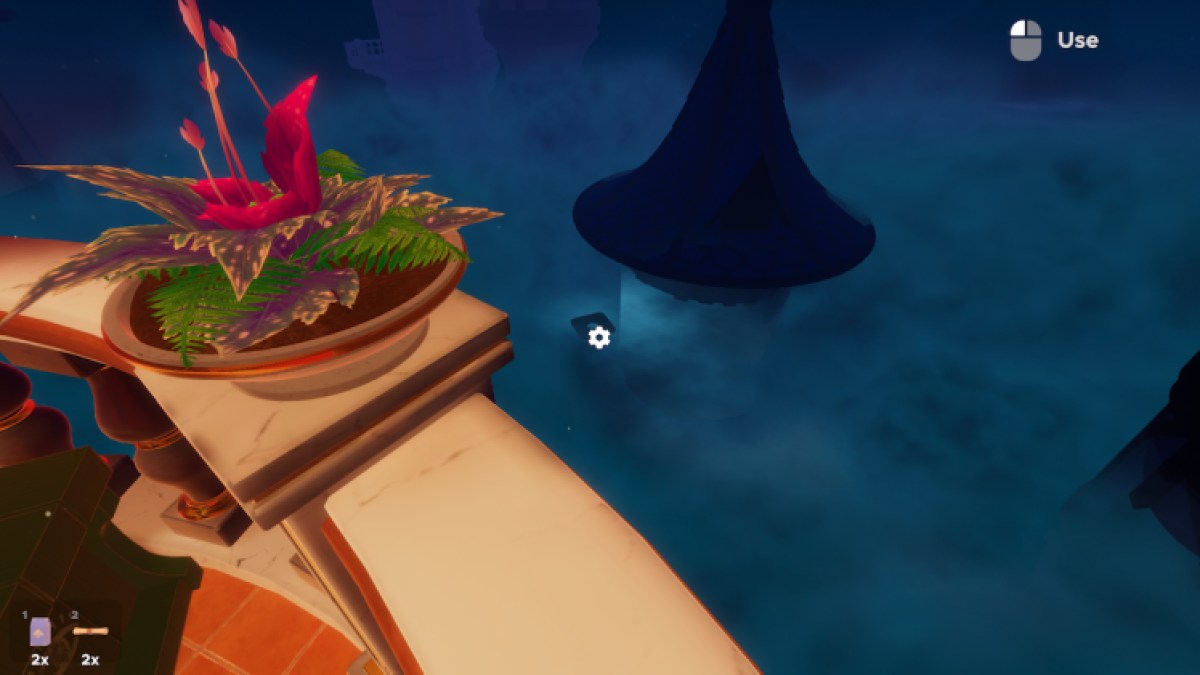
In case you look exterior from the balcony of the primary tower, you’ll an enormous Token subsequent to a tower.
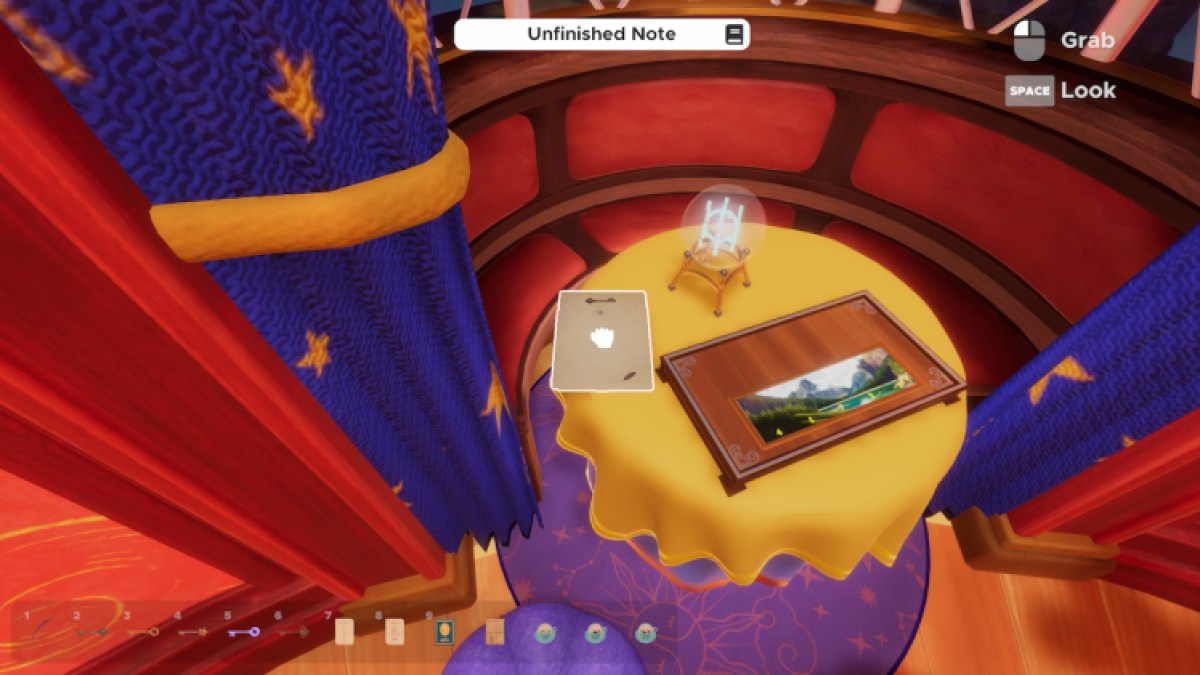
Within the portray

On this portray within the second tower, a Token is current.
Within the tapestry

There’s a Token within the tapestry within the second tower.
On the shelf
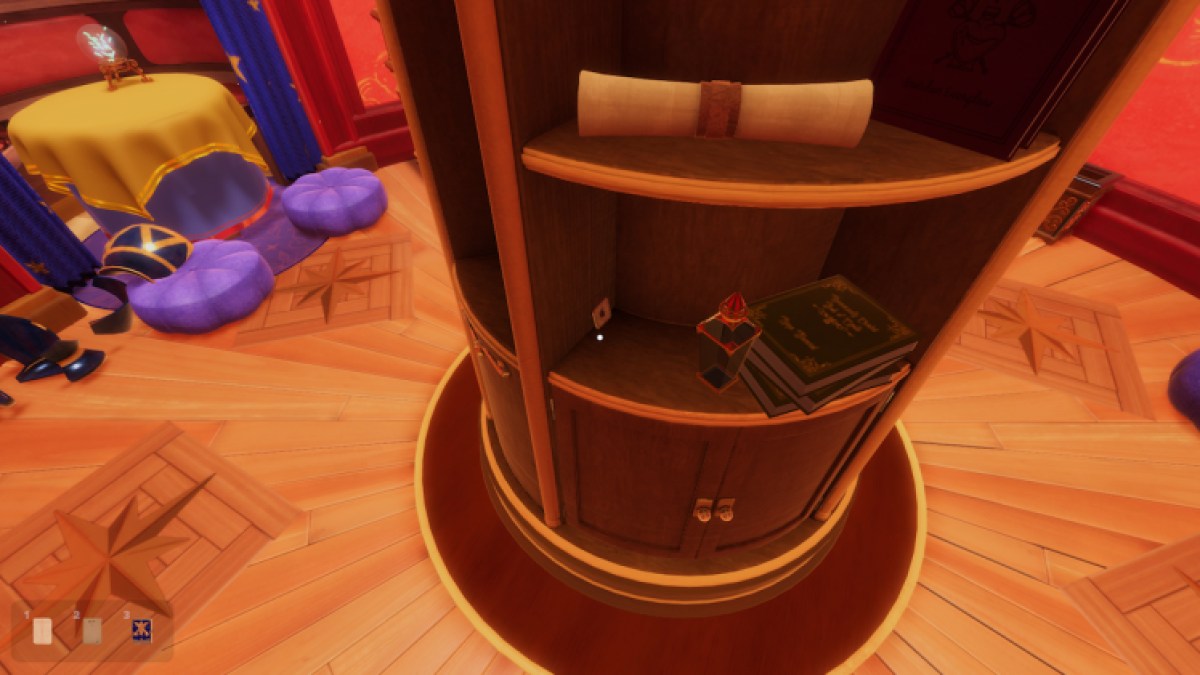
On this shelf within the first tower, a Token sits.
Within the stand

Within the stand within the second room hides a Token.
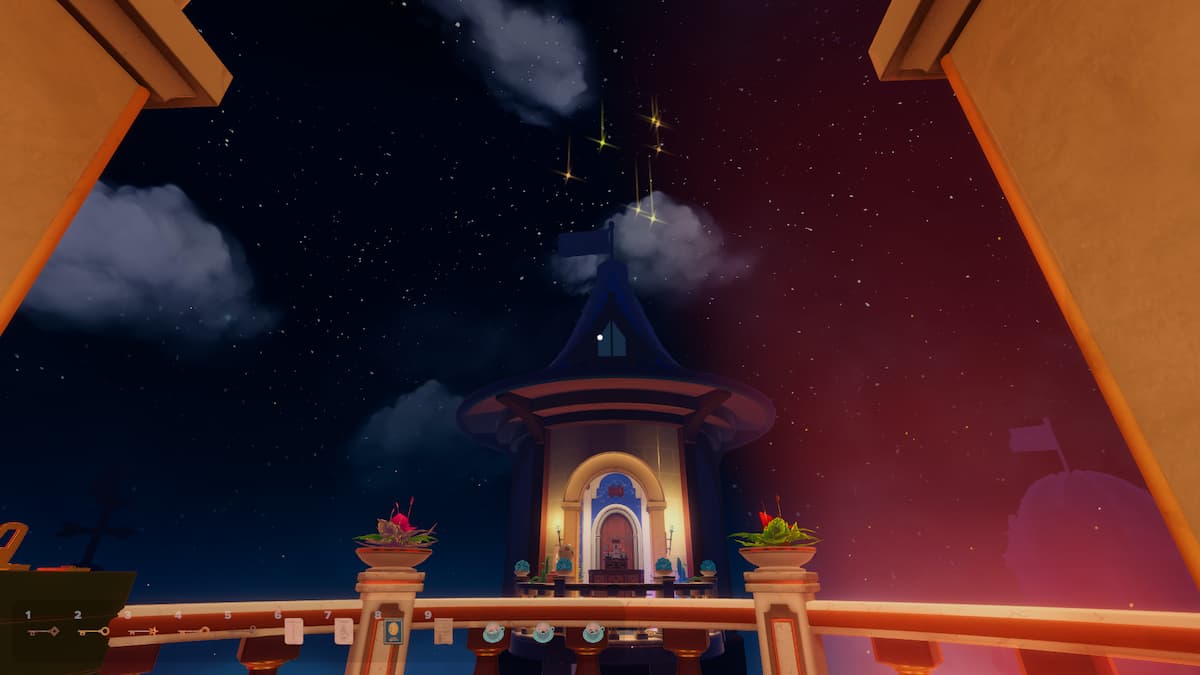
Within the Stars
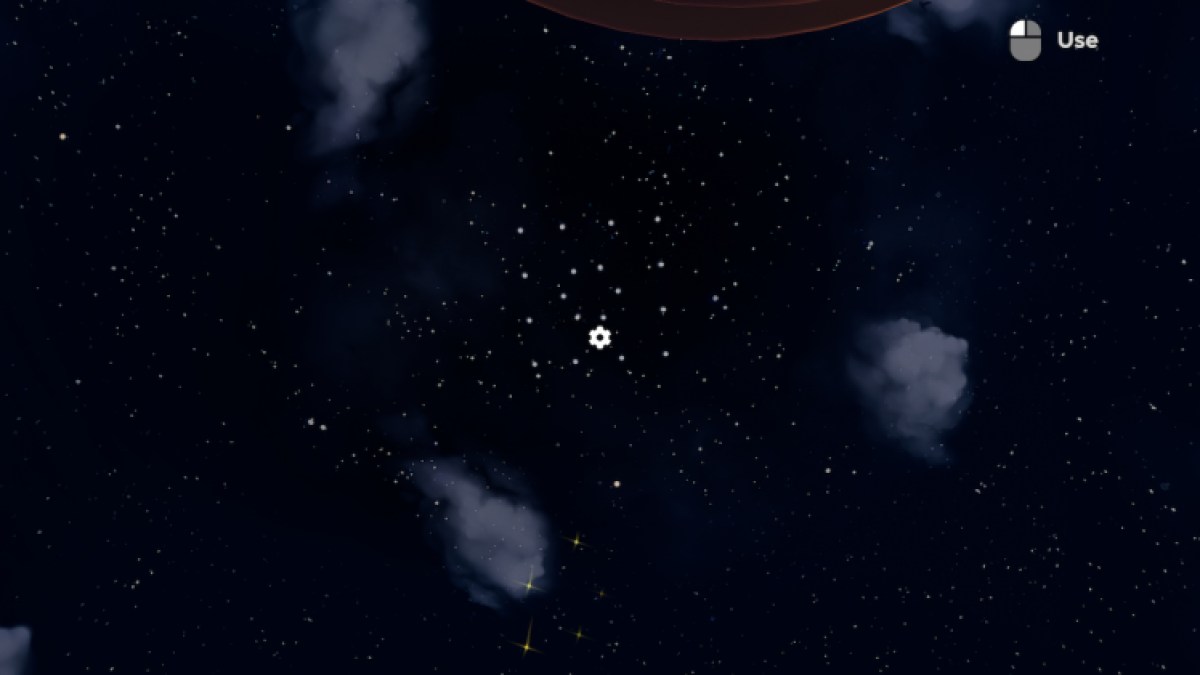
Within the sky, there’s a Token on this unfastened constellation.
There we’ve it, your walkthrough of the Divination Tower of the Magic DLC for Escape Simulator, in addition to virtually all the Tokens. Why don’t you see our walkthrough of the Chronomancy Corridor should you’re scuffling with it?
